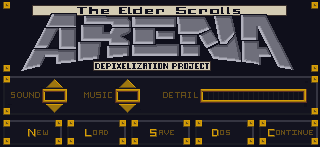
Here is the before and after for the in-game menu. I probably should have shown it more clearly in the last post (and the video). Overall, I’m very pleased with it.
– Martin

Here is the before and after for the in-game menu. I probably should have shown it more clearly in the last post (and the video). Overall, I’m very pleased with it.
– Martin
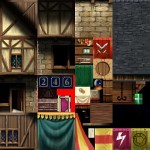
In-game menu
I’ve held off on doing the in-game menu because I didn’t feel the necessary inspiration to tackle it yet. For me that texture is the face of the game; the one the player sees most often and serves as a sort of “anchor” for the player. Another factor may have been that I knew I would end up spending several hours on it to get it just right. Going in, I knew I wanted to keep the ARENA word at the top in roughly the same shape but with a much cleaner design and that it needed to be similar to the HUD on the main screen. That covered most of the core design and all I was lacking was gumption.
Once I finally found the urge to tackle it, it didn’t take long for my mojo to kick in. I knew that although I only had 75% of the design mapped out in my head, the other 25% would either come to me while I was editing or result from trial and error (that’s my favorite part anyways). Although I sped this video up twice as fast as the last one, you can still see spots where I paused to consider how to continue and where I changed my mind or adjusted on the fly (very evident with the Save, Load, Quit buttons on the bottom). In the end, I even found room for the project name!
Shapes
I try to stick to colors pulled from the original image. This eliminates any guesswork on making sure the colors match the palette file (really only important for older games that use palette files). Once I have a rough idea of what colors to use, I try and gauge what I want the new image to look like. For bricks and stone, I’ll usually try to draw inspiration from what I start with. In that I mean that I will try and mimic the rough shape and design of the original. I do try and give each set of images as unique an appearance as possible while being aesthetically pleasing.
Video
Since one of my main motivators for creating this website was to chronicle my artistic endeavors, I decided to make some time-lapse videos to highlight the process. The first one below demonstrates what I’m talking about for “easy” textures.
Points of interest
A couple of things to point out from the video:
1. I outlined the shapes ahead of time to create a frame when I colored in the shapes.
2. I colored in one image in the SET file to get a good feel of the colors and general appearance that I’m going for.
3. I do a lot of on-the-fly tweaking (and sometimes overhauling). Sometimes what I end up with is nothing like what I started with.
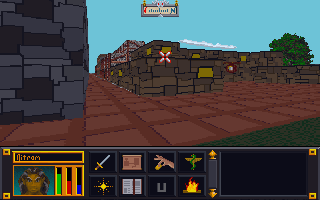
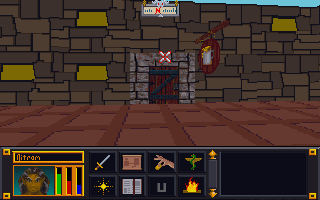
4. I have to check the image in the game in order to see if there are any issues AND to make the final decision on whether I like it or not. In this case, I ended up changing several of the other textures because I didn’t like how they looked. Note in the image below that the city wall and road are different (and in my opinion better) than in the video.

After getting the art files “extracted”, I expermented some with changing them using GIMP. For Darkstone, the art files (particularly for the ground and buildings) were a single picture composed of many smaller pictures.
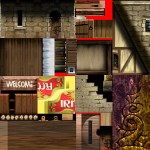
The game engine would know that if it wanted image X it would have to look at a specific piece of art file Z. This meant when I wanted to change one art asset, I could edit 16 different ones at a time. To test it out, I would just draw a letter or number in a huge obvious way on top of the exisiting art for each distinct section. Then when I loaded the game and look for where that letter or number appeared in the game.
The problem I ran into with Darkstone was the changes didn’t take at first. I had to troubleshoot why. It turned out to be a issue with how the file was saved. Darkstone required textures to be saved without any file compression. I simply had to resave the file “uncompressed” and it worked. With Darkstone, at that time I didn’t have any clear direction for what I wanted to do. It was more of a trial run to see how it all worked. Experiment done, my attention drifted away from Darkstone. It was more an issue of time since I didn’t have much so I would work on this a little here and there when I felt like it. Though later I would come back to Darkstone with a more focused purpose.
