Category: technical

  • Blakestone HD textures sneak peak

    Blakestone HD textures sneak peak

    Recap

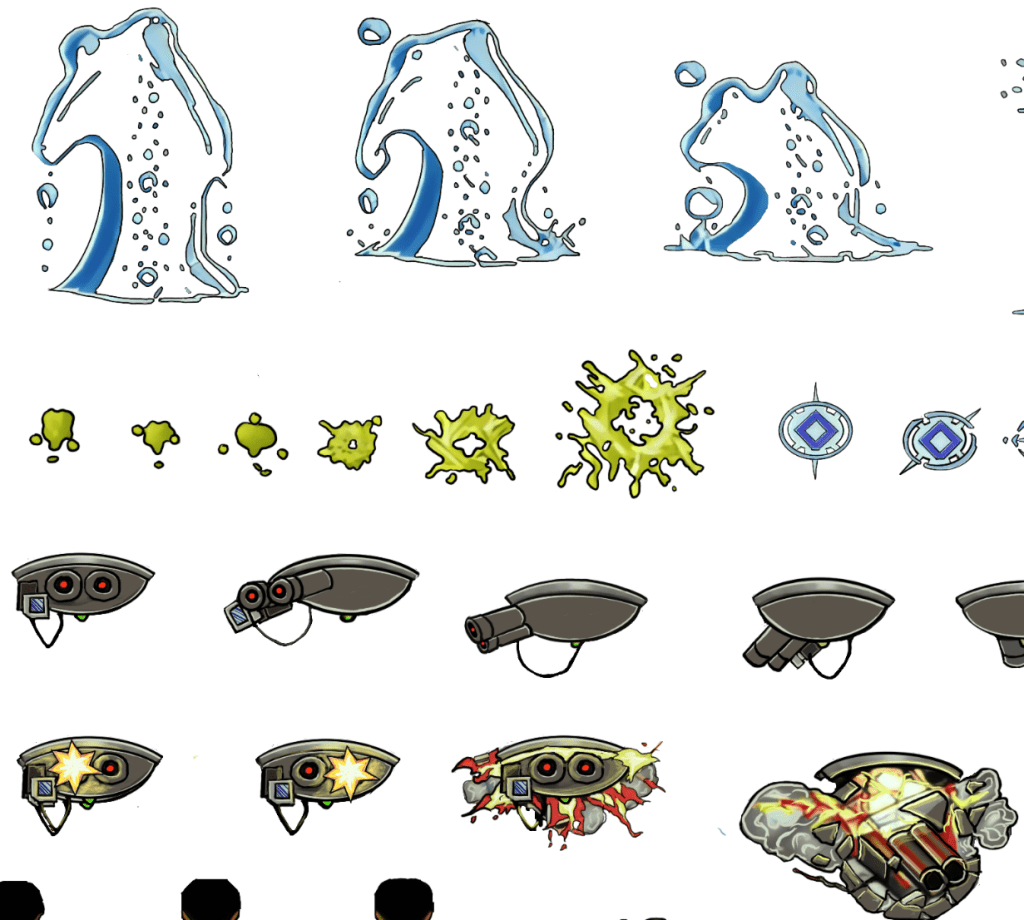
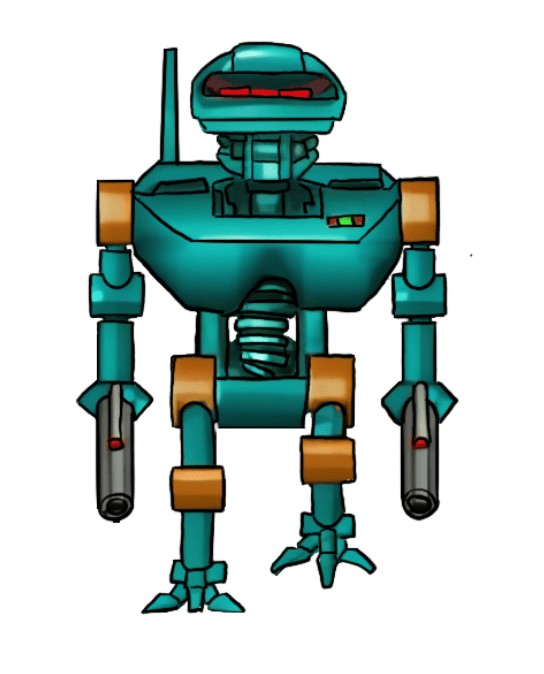
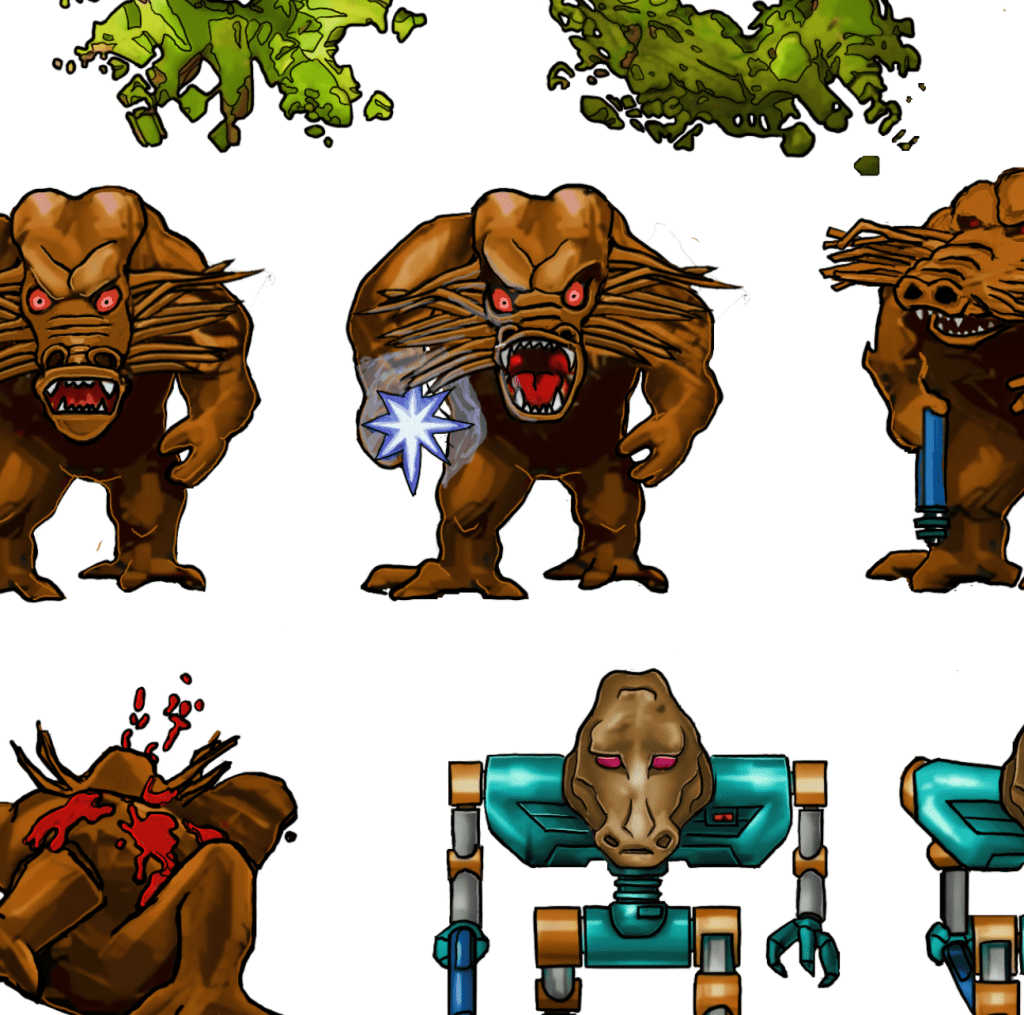
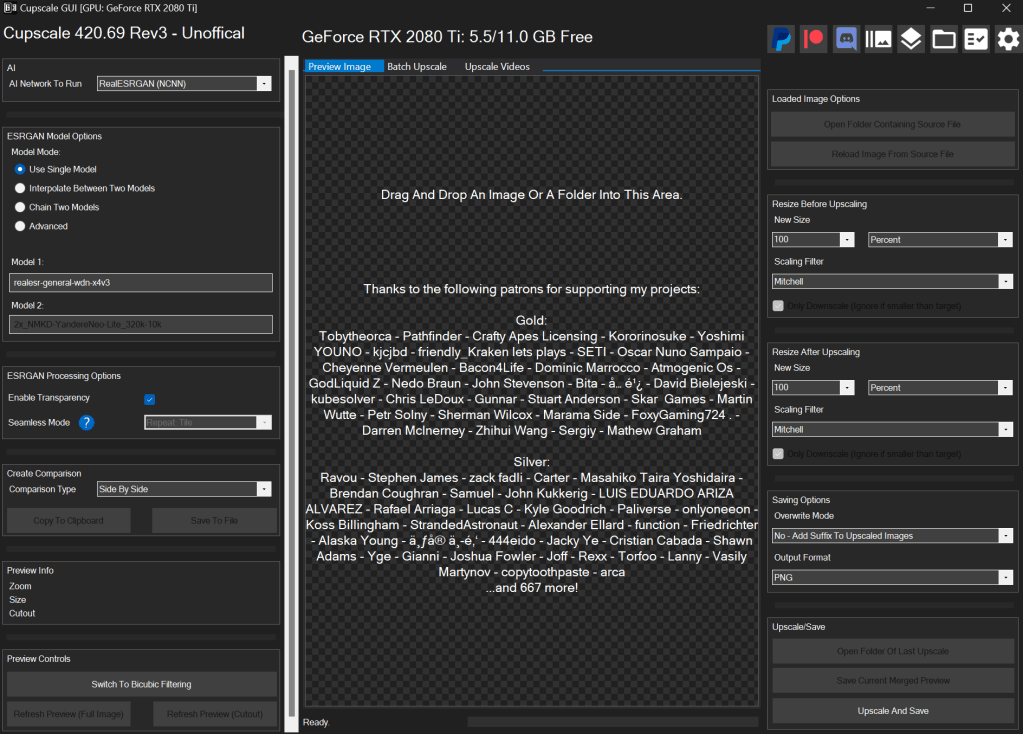
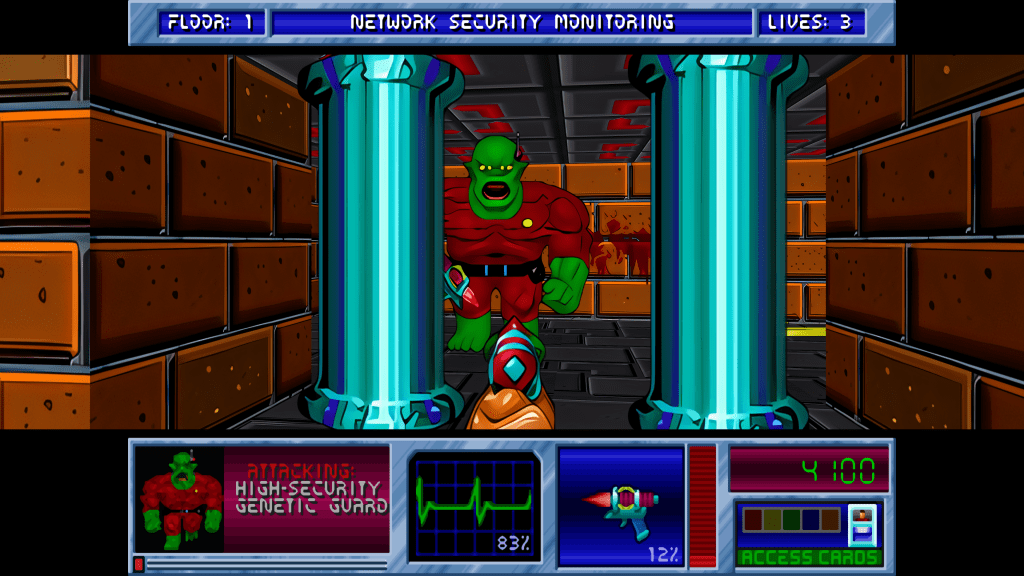
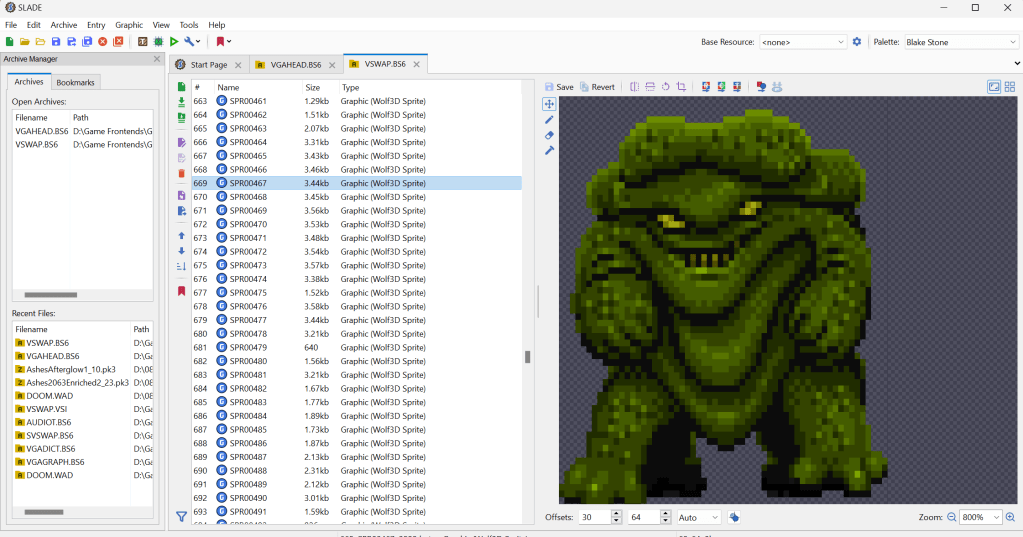
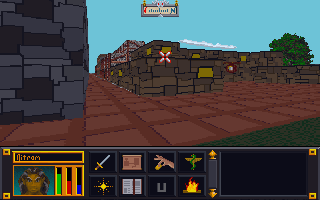
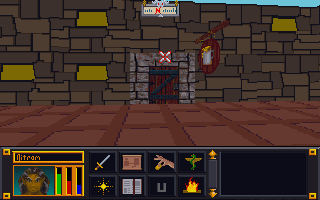
    I have been working on remastering the textures from Blakestone on and off for several years now, initially dumping and light upscaling them for ease of redesign. From there, I started hand drawing over the old textures adding detail and transforming a blurry pixel-y mess into what you see below.

    A key goal is to maintain the spirit of the original pixel art and only add detail that enhances or complements the composition.

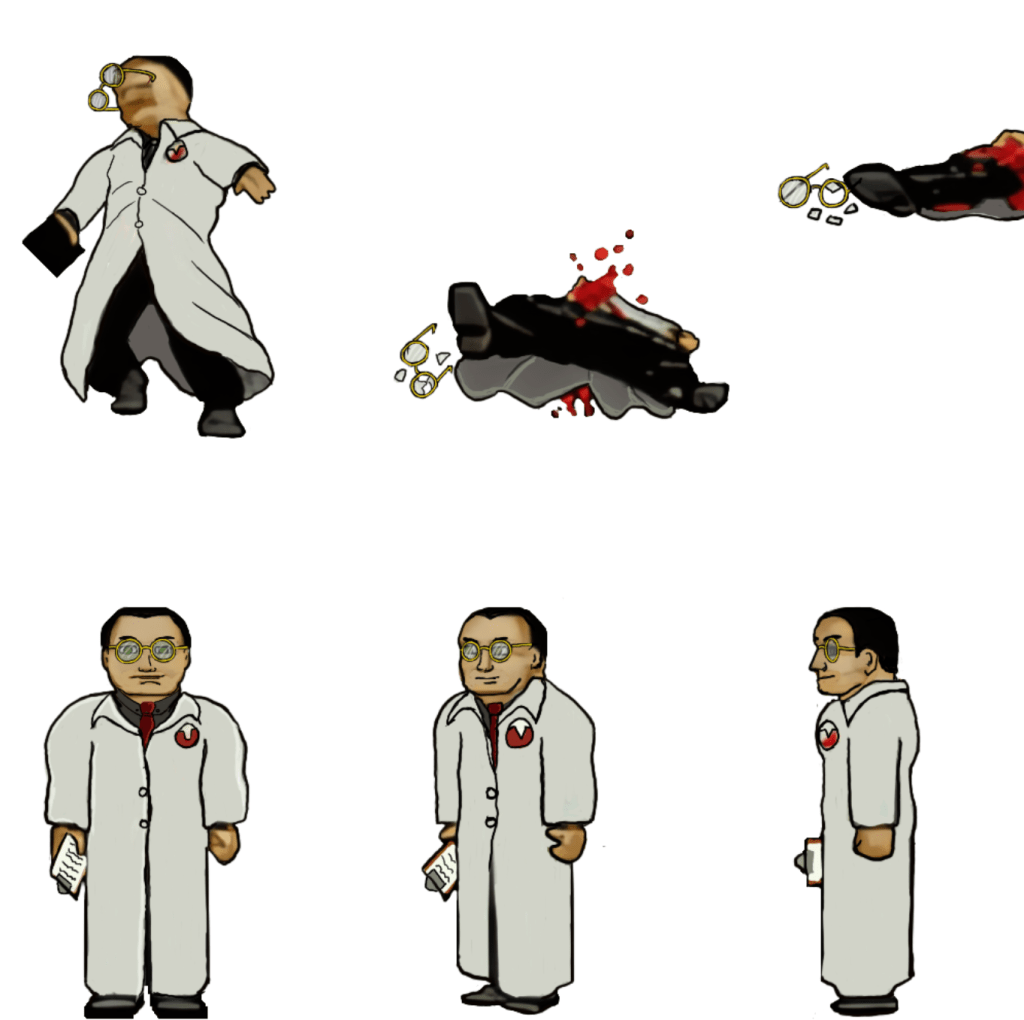
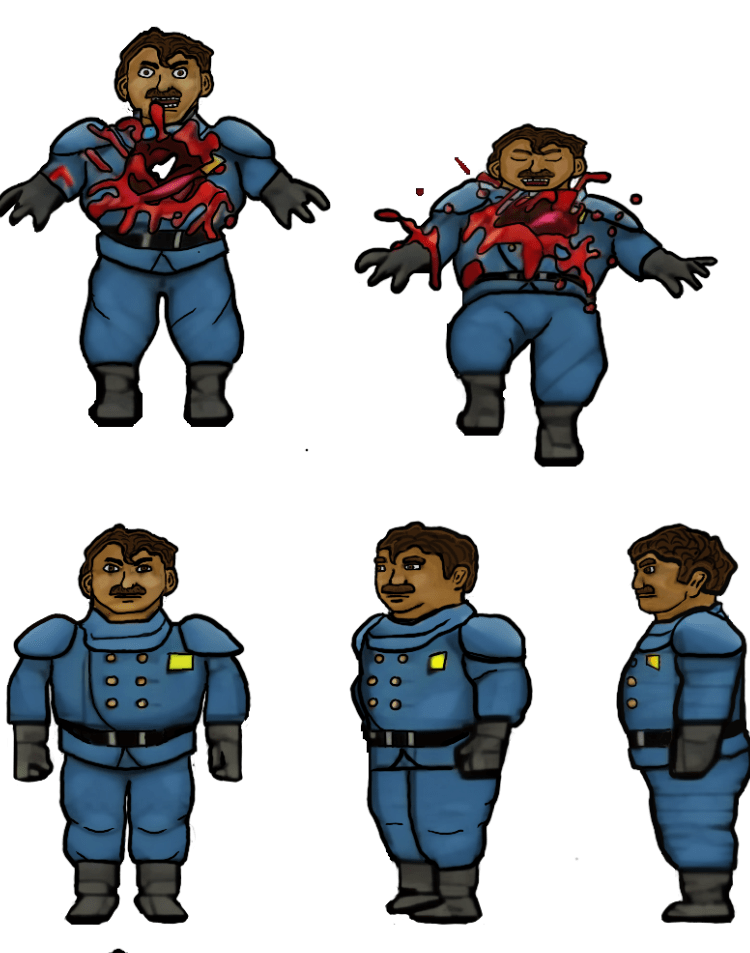
    The human NPCs are a pain in my rear

    Some of the images, such as above, are fairly straightforward and are easy to interpret for the new design. However, some of them aren’t the greatest in the original format or so low resolution that they require more creative effort to bring to life. The scientist’s face, for example, was a blobby mess that lacked defined detail in key places. I had to envision what the new one would look like and that too a lot of back and forth experimenting to get the vibe I wanted.

    Setbacks

    I do most of my work on my IPAD. I somehow corrupted a couple of my sprite sheets that I had already completed (but like a dummy hadn’t exported yet). That was about 150 completed textures (several of the monsters) of the thousand or so I’m redoing. It was a brutal motivation killer. I had to put the project aside for a while till the pain of it faded and I regained motivation.

    Now

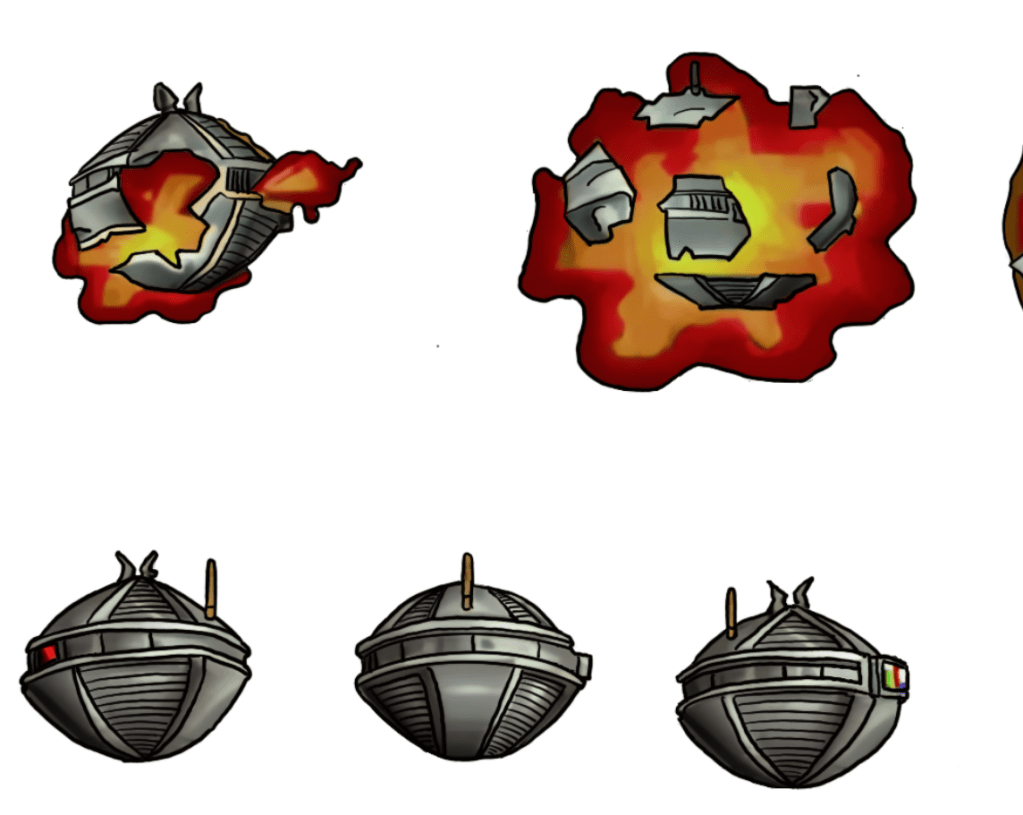
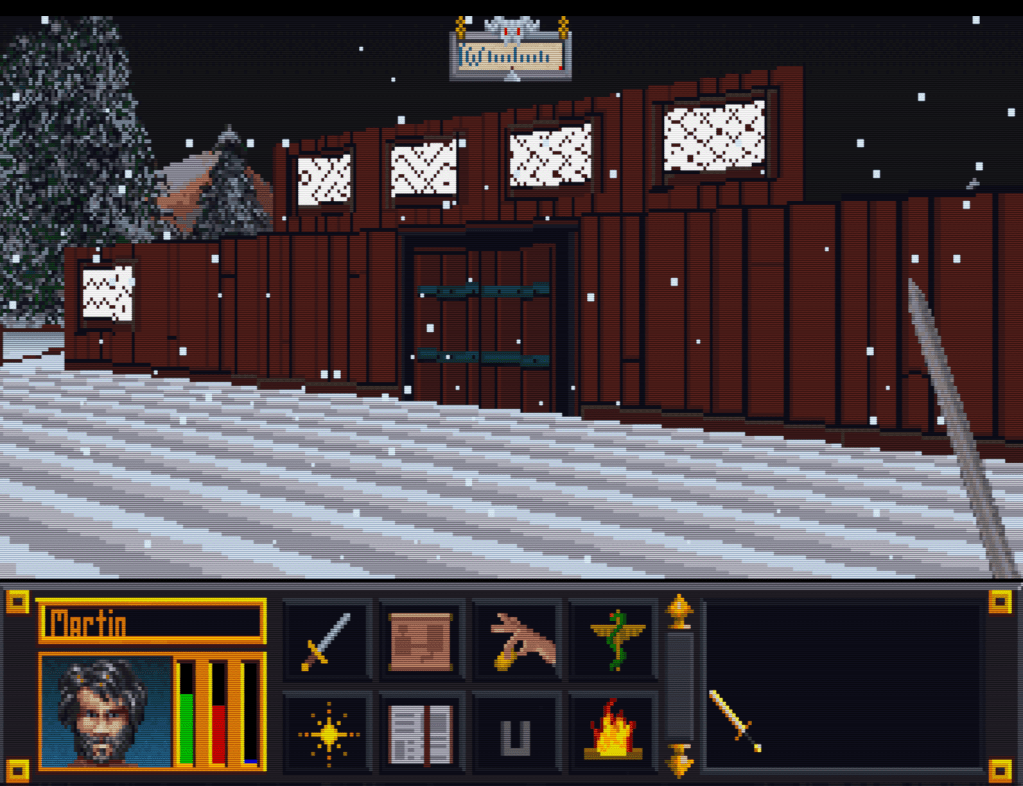
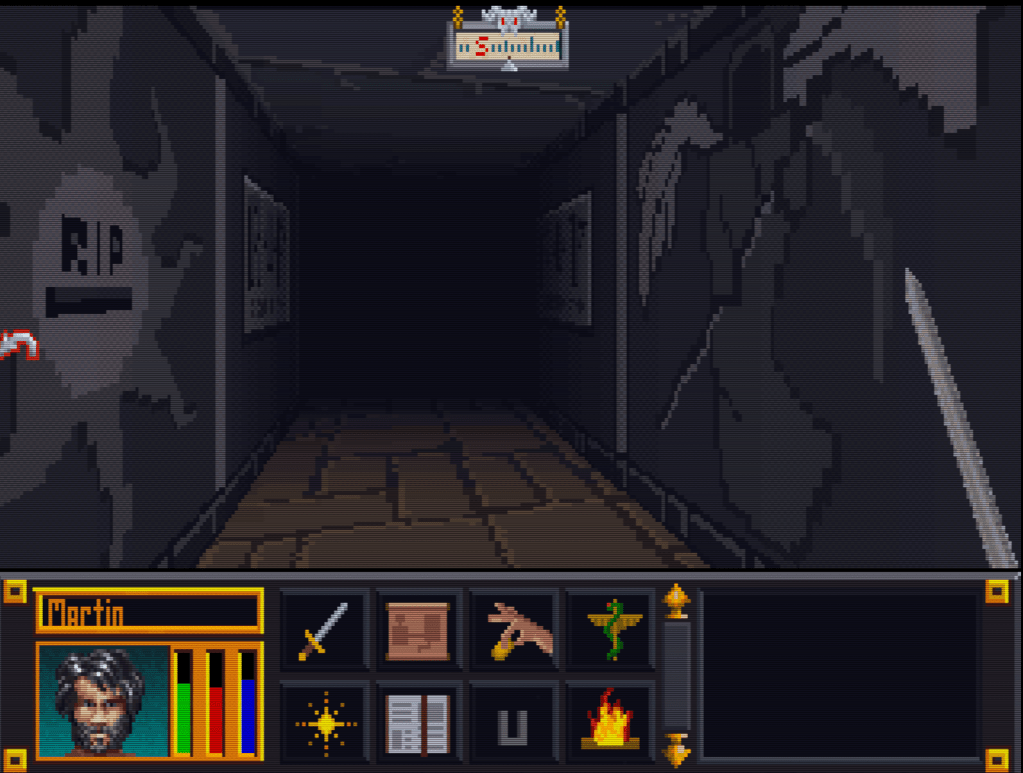
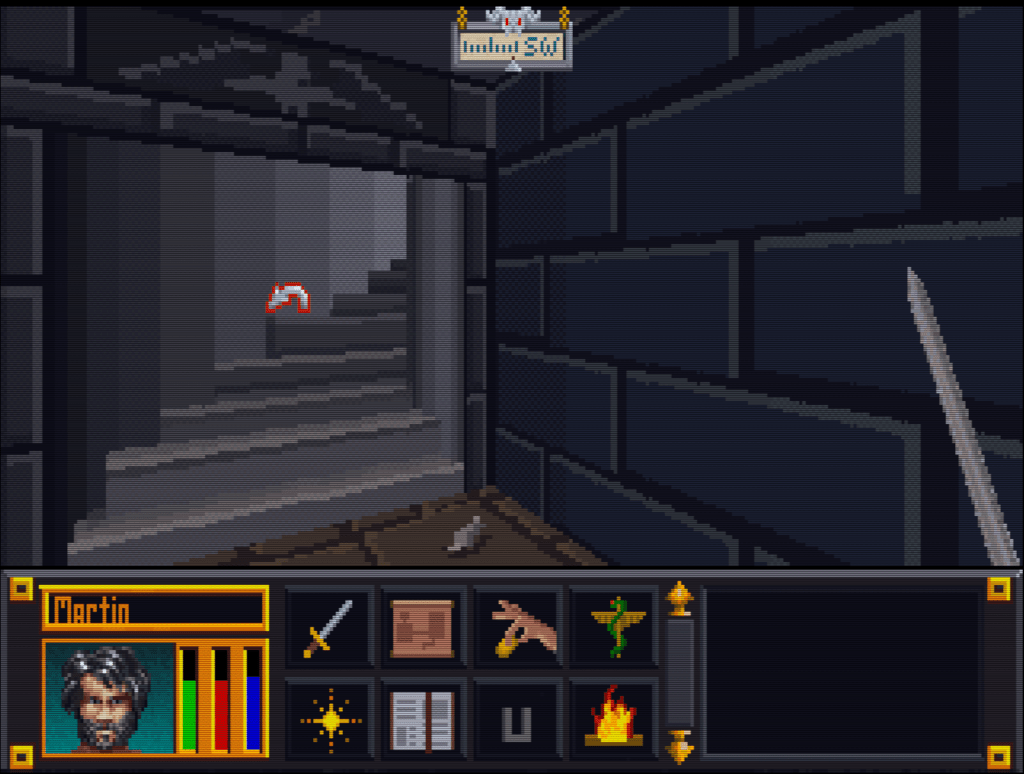
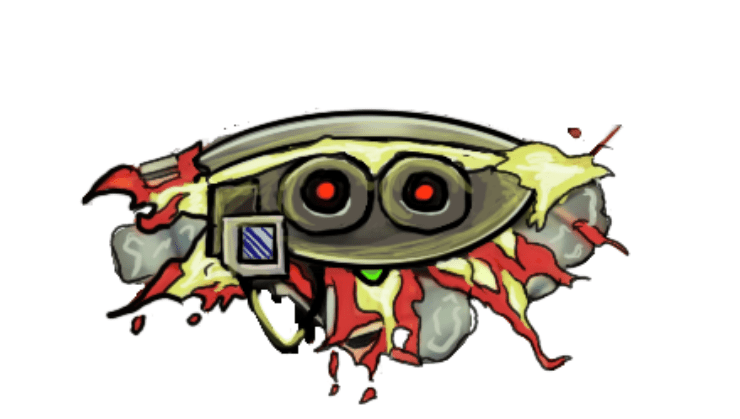
    As with the TES Arena Depixelization Project (ADP), I’m slowing picking steam back up. I am also long overdue for a few sneak peaks. Please note, that these are still alpha. The combination of trying to keep the same shape and vibe of the amateurish looking originals and the fact that my versions are drawn on the IPAD “look” may seem slightly not ready for primetime (i.e., like a kids notebook drawings) but I have some post drawing steps to take to up the quality some more.

    SIDE NOTE: Some of these monsters are incredibly terribly designed. I wanted to change a few because of how childish they looked but decided to stick to the original version. So the goofy monsters are still goofy.

    Progress

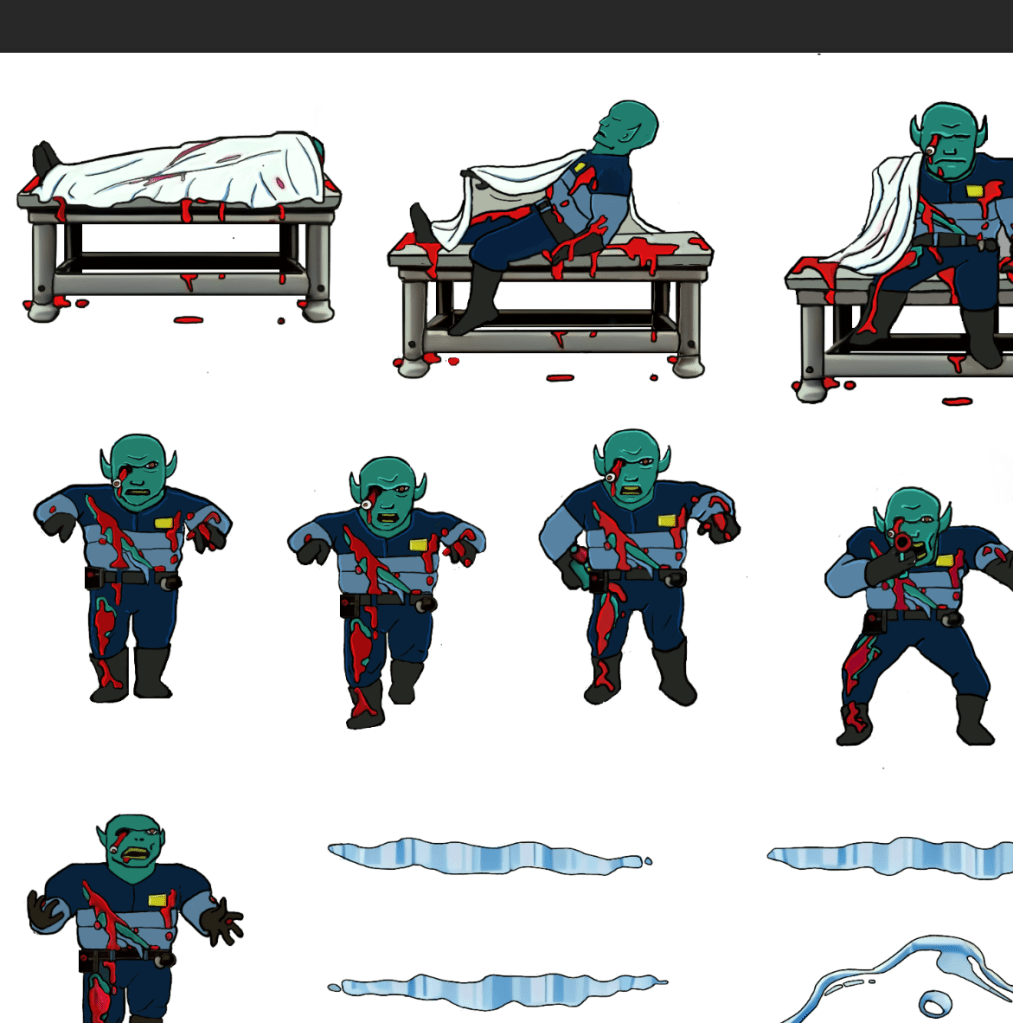
    I have quite a bit done, most monsters have been completed or final designed. The initial security NPC is done, the scientist is 1/2 the way complete, but the other three are still pending. All miscellanceous textures are complete. The walls will be last but are the least difficult to fix.

    Enjoy

    Martin

  • ADP lives….yet again…well, technically it never died.

    THE RIGHT NOW

    Let’s just ignore the fact I haven’t posted in quite a bit (or that I started this project 13+ years ago). To be fair, I have released three other Arena mods in the meantime (more on that in the future).

    I recently started digging back into the Arena Depixelization Project (ADP), my graphics replacement mod for The Elderscrolls: The Arena, and I have been hitting it hard.

    I’m doing a recorded playthrough looking for missed art in the game and general quality control. This has led to me not only finishing missing textures but also tweaking (and sometimes overhauling) 90% of the work already done. I guess over 13 years of game art fiddling has matured my style slightly.

    THE SWAMP

    I first had to corral all my work over the last decade+. I had 7 different versions saved through the year and some files went missing so I had to extract them all compare and then pull any missing forward. This project was quite a mess (no file discipline at all, the shame). Then I had to relearn the tools, but that didn’t take too long. Then I created a new working directory and archived all the rest to clean up my sloppy work.

    In just 2 weeks, I have probably edited almost 100 textures already. As I record my playthrough, I save when a missing (or ugly/mismatch) texture is found and either fix it ASAP or catalog a bunch at once to do in a surge.

    GALLERY

    Here’s a slew of screenshots I made from the most recent version.

  • Blake Stone gets a glow up (PART 3)

    InGame

    Now the naming and image dimension issues have been resolved, so I loaded the game and it worked perfectly! Drunk with power, I ran a quick and dirty (i.e. impatient) bulk upscale on every texture just to get the payout of seeing that high resolution quality in gameplay. I wish I had a picture, but I don’t sorry. So you’ll just have to settle with one of my test pictures. The ultimate result of that initial effort was a messy, uneven upscale that wasn’t very good.

    WTF is upscaling?

    I’ll take this hot second to address this topic for those not in the know. One of the first “AI” booms was image upscaling using an algorithm model called ESRGAN (it stands for something, but no one cares). There are many models now, but that one paved the way. Note, when I say “AI”, that’s really just the media branding of this technology because the technical stuff is not as sexy. It (and most of the current AI stuff) is nothing more than highly sophisticated pattern recognition software. You teach it what 200 apples look like in low resolution and high resolution. It learns that when it sees a low resolution apple what the approximate of a high resolution apple might look like and gives you that. See how boring that already got….hence “AI”.

    I use a program called CUPSCALE, which is a frontend for the tech behind it. It allows bulk upscaling, supports most common image formats, and allows switching between different models. Best part, it will install all the needed files (python and all things related) for you, so it’s as close to plug and play as possible.

    Almost a mod?

    I spent many hours trying different combinations of upscale models. Finally, I settled on a workflow that best accomplished the cartoon look I wanted. I started with 1X upscales (meaning no change in size) just to clean up details. I focused on de-dithering, which was often used in old games and extremely low rez art, and sharpening detail a little, so colors weren’t bleeding as much (refocus model). Then I scaled it by 2X using 4XNickelBack model and reducing 50% afterwards. After much trial and error, I found this was the best option for Blake Stone art as it was the least destructive to the essence of the picture. After that I hit them with a couple rounds of a FSManga model to make them more cartoony, with a 50% resizing here and here. Ultimately, I ended up with game textures that were 6X the size of the originals that had a more cartoon appearance.

    UP NEXT TIME….A new mod is born!

    Part 4 will be about releasing my first full HD texture mod. But it doesn’t stop at Part 4 (wink wink).

    – Martin

  • “Extracting art from Blake Stone” is not a very funny title (Part 2)

    “Extracting art from Blake Stone” is not a very funny title (Part 2)

    Collecting Pixels

    Step one is figuring out how the game stores the art files (textures). Normally what I do is check for the largest files, as they are usually the texture and/or sound archive. However, with Blake Stone, I knew that this game used Wolfenstein 3d-style archives. Blake Stone’s format was slightly different and used the extension BS6. But it was close enough that Slade, a popular tool for actual Doom and Wolf3D games, worked perfectly to extract the files.

    FUN NOTE: I started this many months ago. I JUST noticed that BStone has a command-line option to extract textures. #facepalm #hashtags #DOH

    You may call me…”Tim…er… I mean SPRITE”

    The BStone program looks in the “aog” folder for any textures (Planet Stike has it’s own folder, “ps”). If it finds a texture there, it will use that texture instead of the original. Unfortunately, BStone only supports sprite and wall files. That means some elements can’t be replaced currently (mostly UI and cut scenes). For Blake Stone: Aliens of Gold, there are 1017 sprite and wall textures but there isn’t a folder structure. They all just go into that one folder which makes it easier to manage.

    I extracted all textures to a working folder and hit it with a quick and dirty upscale so I could check how it works in-game. After dumping them into the “aog” folder, I booted BStone and enabled “External Textures” in the option menu. It didn’t work. Turns out that the extracted files were names were very slightly misnamed when extracted (SPR instead of SPRITE, etc.). It was easy enough to fix with a utility called Bulk File Renamer. A quick touch up and I reloaded BStone to see if that fixed it.

    Stretching them on the rack (by rack I mean in Photoshop)

    It worked…sort of. The textures were definitely upscaled but many of them looked squished (skinnier than normal). Quick glance at the readme revealed that rendering of sprites was not 1 for 1 in-game.

    After a little experimenting, I realized that every texture just needed to be perfectly square. Maybe the extraction method was flawed, not sure. To fix it, I just made a quick macro on my Logitech keyboard (frequently my savior for repetitive tasks), dumped 100 or so textures on photoshop and ran the macro (it resized the canvases to be 64×64, saved and then closed the file). I just needed to hold down the macro button and let it work through each file. After finishing all 1017 textures, I saved a backup for the inevitable time I make a drastic mistake. (I will share the reformatted originals when I get around to doing Planet Strike)

    Up next time…..Version 1 of my Blake Stone HD texture mod

  • 2023 update…so…yeah..it’s been a smidge

    Peek-a-boo! I’m back and I have a ton of updates on the art side and just a few on the writing side. Lots of life changes slowed me down for a while. Though this might be a boring update, I’ve been gone long enough that it needs addressing. Sorry 😛

    THE WEBSITE

    It’s about time for an update to this website for 2023. Let’s hope I can make the next post before another 2 years pass. Though, I would like to transition to another web service eventually, but I’m not sure when that will happen. I need to figure out how I want to organize all the posts and what kind of menu it will have. I’ll keep this URL though. I kind of dig it 😉

    The idea is to make ArtInPinkerton.com the central hub for my various online activities and consolidate my nerdy world under one umbrella. Naturally, the key to “big plans” is the carry through and that can be the tricky part. A recent programming revelation has made me realize that the biggest barrier for me is the logistic preparations that have to take place before I get to do the thing I actually want to do. For example, I find WordPress clunky and the thought of having to wrangle it for when I write an entry often is enough to put me off.

    Right now, I want this website to highlight my various artistic endeavors and hobbies. Off the top of my head, that will include:

    1. Writing and stories
    2. My YouTube channel Martin Saves the Universe (video game play and modding)
    3. Painting and miniatures
    4. Boardgaming
    5. Podcast (Nerds and Normies, no longer active)
    6. Technology
    7. Other

  • So easy you could do it at home

    So easy you could do it at home

    I had a couple people ask where to find the tools I’m using for the Arena Depixelization Project. So here are the links…

    Arena Modding Suite by Hallfiry and Arena Toolkit by Dysperia

    – Martin

  • Cork on a fork

    Cork on a fork

    This is Jiub. Jiub is the first person you see in Morrowind. He also has a fairly unique head so it was fitting to use him as my first experiment. Easy to test. This Jiub, being my first attempt, is a little crude compared to the later images. The transition as I refined the style is apparent. So here’s what I did.


    55fiqg
    I was watching you sleep

    Resize

    The initial resolution was 256 x 128 pixels. That’s not a lot of room for sharp lines and clarity. Additionally, it’s a good idea to work big and then shrink as needed so I resized the image to 2048 x 1024, keeping the aspect ratio but increasing the size by 8 times. As the fine lines of the borderland style are important, a higher resolution is preferable.  (I tested it when done and shrinking down to 512 x 256 looked OK but 1026 x 512 was ideal for size vs detail).

    Create layers

    I duplicated the image into two additional layers. I do this so I can have a pristine backup, a working copy and high pass copy (if needed). The high pass allows me to see the areas needing outlines more clearly. I don’t always use it but it’s handy if needed. I created a new layer that is transparent to be my actual canvas for the black outlining. Showing but underneath the active layer would be the working copy or the highpass copy to use as the base reference.

    Outline

    tx_b_n_dark elf_m_h09
    Jiub 1.0…crude untapered thick lines

    Like the video linked in my last post, I started creating outlines highlighting particular feature areas that stood out for change in shape. My  variation on this style leans more to outlining surfaces with changes in height but not color fluctuations (e.g. later on when I get to tattoos, I likely won’t outline the tattoo.) I looked for distinctive wrinkles and natural feature as well as abrupt marks like the scar.

    As you can see in Jiub 1.0, I failed to refine the lines after I finished outlining. I didn’t use shape dynamics or taper and thin out the lines. Crosshatching was also minimal.

    Check

    Jiub Vanilla Base to Borderland
    NifSkope and Jiub 1.0

    I used a program called NifSkope that lets you see meshes rendered with textures and animation if applicable. It was there that I saw how odd the texture stretched due to the 3d model’s crude animation and UV texture mapping. The eyes looked really weird as the mesh just stretched down a single point to mimic blinking but the texture stretched the area above the eye down with it. The mouth opened up very much like the canadians in South Park. Because of that, I had to go back and adjust the lines to minimize the line bleeding when the textures stretched.  You can also see where the original texture has errors such as the red eye’s inner lower corner bleeding onto the eyelid.

    Tweak

    Because this is a more cartoon-like look, I experimented with using an unsharpen filter on the working copy of the original image to exaggerate the colors and then a smart blur to blend the blemishes away some. Additionally, I added shadows and highlights by drawing on a new layer black and white respectively at 50% opacity and then blurring it to look like light smudging.

    Next time, I show the other, more refined textures I completed AND Jiub 2.0.

    – Martin

    20160606075309_1
    He fell passed out drunk and the guards found a Sharpee

  • Tablet 2.0

    Tablet 2.0

    UpgradeHurion 650 Pro

    Over a month ago, the pen for my trusty Wacom Bamboo tablet (see first post ever) broke. This was quite disheartening as I love having an art tablet and it was hard to be motivated without it.

    After much research and reflection, I have finally picked up a new tablet: the Hurion 650 Pro. The great thing about it (besides the very positive ratings) is that it functions at the level of the middle tier Wacom products but only cost $79 US dollars on Amazon.  I can’t wait to take advantage of the added features it brings.

    Breaking it in

    After it got installed, I fiddle with my new toy using GIMP (side note: really tiring of using GIMP and its limitations). I was working on a homework project and had a picture of a pencil loaded. Just for fun, I attempted a very hasty and crude pencil outline of the pencil. It’s rough but I’m sentimental and it’s the first official drawing on the Hurion. I merely looked to trace the major lines and add some crosshatching…I wasn’t very attentive to keeping straight lines because this was more to test out the tablet than make art. However, I like it anyway.

    – Martin

    My first creation on the Hurion 650 Pro
    My first creation on the Hurion 650 Pro

  • Rolling a critical failure

    Windows to the soul

    Recently while playing around with “vanilla” (unaltered) Arena, I noticed that the windows turn on an off for day and night. I believe this is based on the window color being pure white. In quite a few of the SET files, I had made the windows yellow breaking the on/off effect. It’s an easy fix though.

    Revised city wall and road
    The most exciting screenshot EVER!


    Borked Windows

    Caveat: I’m a hopeless tech nerd.

    I like trying out software and technology. Things like text-to-speech, software debugging, emulators, etc. are like candy to me. Why is this on an art blog….err i mean…collegiate journal? Because sometimes I mess stuff up. This time I was trying to get a Windows XP/7 program that doesn’t like Windows 10 to install on my computer. In doing so, I borked my login so that it wouldn’t accept my password. From that point started a chain of events (all my own doing) to fix it that made the situation worse and worse. Finally, I couldn’t even boot my machine. Seriously, I’m pretty good with tech but on this day I rolled a “1”.

    Long story short, I recently had to wipe my boot drive (no important files were on there but the OS) and install a clean Windows 10. I tried to cold turkey eliminate using GIMP since I already have Photoshop. That didn’t work too well. Photoshop is different enough that some very common things I was used to doing all the time in GIMP didn’t work. I’ll probably start watching some intro videos to see how Photoshop works before I try that again.

    All in all, not my proudest tech week (or two).

    MIF

    I did some research into the MAP files for Arena. However, I want to compile it in a cohesive manner so that post will wait till I feel it is ready enough. My hope is that the information that I have uncovered might help others if they decide to “crack” the format.

    Martin

  • Doors and Floors


    Get it together man

    Now that I have finished the “walls and halls”, it’s time to renovate the doors and remaining floors. I have finished almost all the ground textures though (well a few could used tweaked too). In the past, I just worked directly in the directory where I extracted the files and reinserted them into the BSA from there. However since there are so many IMG files (949 to be exact) and that isn’t the cleanest way to work from a project management perspective, I pulled all the door files out to a separate folder/workspace and created a completed folder to use for importing files back to the BSA.

    Tavern with old door art
    Must have ran out of paint

    Doors, Doors, Everywhere there are Doors

    There are 112 door files not including non-doors that would serve as potential transition points (e.g. ladder up/down, stairs, etc..there are about 12 of those). These IMG files come in two variety, framed and whole texture.

    I’ve been framed

    The framed doors are “framed” with the texture of the building to which they belong (e.g. the Mage Guild door has a frame art that matches the building).  To do these, I’ll just copy and paste a wall from the matching set file and layer it under the door so it’ll be a perfect fit with the rest of the building. All exteriors and some interior doors are framed doors, pretty much any door that transitions between outside and inside.


    That’s no small wall…it’s a door!

    The other type of door is the whole texture door. I have done a few of these previously as you can see in the screenshot. These doors belong to all the interior rooms and are the ones that swing open so you can enter a room. Although they are relatively simple (as they repeat the same textures over and over for different files), I’m hoping to add a little more variety to them.


    First things first though, I will test to see if each IMG file is used in game (i’ll probably do them in batches). I have already found several that aren’t. I will likely still redo them just in case. Worst case scenario, if I ever can get anyone to figure out how to decipher the MTF files, I will use them to make new dungeons and buildings.

    – Martin

    ,